Markforged brand released Mark One a couple of years ago and it created a lot of buzz in the industry. The printer was well accepted due to its low cost and much-admired functionality. It is by far the best desktop 3d printer. Now, this brand has come up with its new release of Markforged Mark Two. This model has been addressed as the world’s first composite material 3D printer ever introduced in Indian market. We at Think3D will take full responsibility to introduce you to its amazing features and how it is different from other 3d printers in the industry.
Before we go further, it is important for you to understand what composite materials are?
Composite Materials are two independent materials with different physical and chemical characteristics. However, when these two different materials are brought together, it creates a new material with unique properties of its own. Composite materials have some amazing properties such as, they are:
• Stronger than other materials
• Lightweight
• Lesser in Cost
These materials are basically used to create buildings, aircrafts, outer bodies, and in defense. These materials are ideal when you require lightweight yet strong materials. Carbon Fiber and Nylon are the most commonly used composite materials.
So basically, Mark 2 has the tendency to work with composite materials and create new materials for multiple uses.
Before we go further, let’s talk about the specifications of the machine. The materials that this machine supports are Nylon, Fiber Glass, Kevlar, Carbon Fiber, etc. It has the build volume of 32 x 13.2 x 16 cm and the minimum layer height is 100 microns. It has got 2 extruders and no open source. No third party materials are supported by this machine. This machine supports three types of connectivity options such as USB, WiFi, and Ethernet.
Setting Up Markforged Mark Two
The printer comes in a labeled box and you can easily unpack it. The machine is finely packed in the box with every part very carefully placed so that no damage can happen to it in any way. The Pelican Case holds the nylon filament spool.
Coming to the connectivity, this machine as mentioned earlier can be supported via Ethernet, Wifi or USP port. It is best to run it with wireless since you can keep the machine anywhere in the workshop and get the work done. The accessories of the machine can be found in an accompanying box and setting up of the machine is also very easy and uncomplicated.
At the rear of the machine, you will find a power switch. When you will press that switch, the machine will boot up, allowing a small light appear at the small touch screen of the machine.
Unlike other desktop machines that are available in the industry, this one is more interactive with the customers. There is a panel that allows the user to easily operate all the functions of the machine.
So, when you switch on the machine, first you need to connect it to the Ethernet or Wifi. After getting appropriate internet connectivity, the machine will itself update to its latest firmware and get ready for printing. It is a wise machine and does not mess up with SD card or other such contraptions. The machine easily handles all the tasks for you.
On successful establishment of the internet connection, now you can begin with the set up of the machine. With every Mark Two Machine comes a system guide that will assist you in knowing about all kinds of set-up options and processing of the machine. It could be feeding the filament through the machine’s casing or adding an inbuilt platform and leveling it, you can find it all clearly mentioned in the system guide.
While setting up the machine, you might come across bad leveling which itself is a critical problem. The build plates in the machine are solid aluminum billet which comes with special coating for better coordination of the machine. Thus, the leveling part has to be done very carefully if you need better results from your machine.
Unlike other FDM machines, this one has got three point magnetic location mechanisms that keep a perfect hold on the build plate. You can do the adjustment with the help of the screws beneath these locators. It is just a matter of few minutes to carry out this task.
Your selection of material will guide you in setting the level of the bed against nylon nozzle and fiber nozzle. You will require a little tuning and if done properly, you will get best results with the printer. What’s worth noticing here is that not every build requires bed leveling. Mark Two suggests that when the building is done with the fiber, you need to level the bed after every couple of jobs whereas; the building done with Nylon does not require frequent leveling. Moreover, you can keep it consistent for more than 10 jobs. We have personally tested this theory and it runs really well.
Before you commence with the printing process, it is important to apply some glue on the build platform. The glue will keep the object from sticking up to the build platform. Also, you can easily pick up the printed object with the help of a sharp fine knife.
The software of this machine is browser based. You can open it in the Google Chrome and take the processing forward.
Working Of Markforged Mark Two
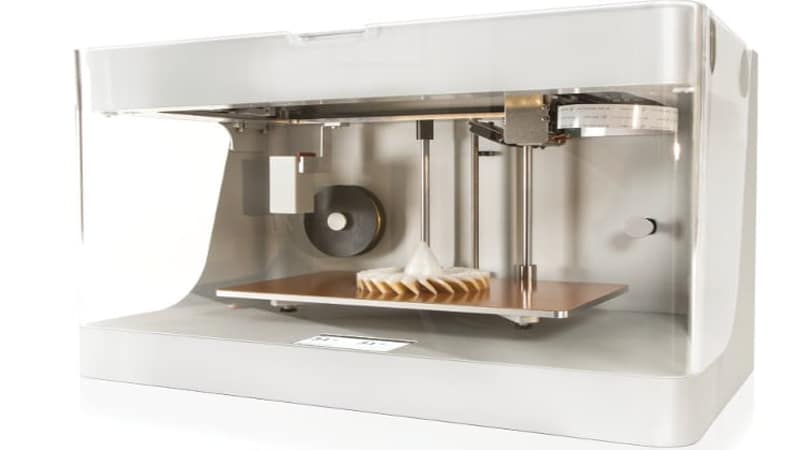
As you know, this machine support composite materials, there are two nozzles where one is for Nylon and other one is for the fiber. There are two tubes that are available to supply the material for 3d printing. The thin tube is for the carbon fiber whereas the thicker tube is for the Nylon.
There are two filaments each for the materials that are supplied by the extruders. Once when the materials are supplied to the machine, you can use the touch screen to manage the prints.
After receiving the print instructions, the machine begins with its processing and in a matter of some time, you can get amazing results.
Post Processing
Every 3D machine requires some post processing assistance. Same way, Markforged Mark 2 also requires immediate attention after the completion of the printing process. The parts have to be separated manually. It all depends on how you have done the placement and orientation of the parts. If you were careful while placing the parts, you will have to endure less post processing pain.
The build plate has accommodated the object so it is quite obvious that it will need immediate cleanup. You can simply pick up the plate, clean it a little and place it back to where it belongs.
The objects that are created with fibers are done excellently. Mark 2 is a filament based machine so it is not created to provide very fine details. But anyways, this machine can do great justice with its printed objects. Whatever maximum you can expect from a desktop 3d printer, this machine will gladly provide.
Conclusion:
This machine has really gathered a lot buzz in the market. The first thing that it has got multiple connectivity options which allow the user to use the machine with utmost comfort. Unlike a local machine, you can be at a distance from the machine and still use it. The machine accepts multiple print requests at the same time and also provides you a clear view to monitor the processing of the objects. The software infrastructure is also brilliant.
The machine has highly professional management and file handling infrastructure. All the controls are available on the touch screen and this machine is highly user-friendly. Every change can be easily managed and new STLs can be easily uploaded. For whatever task that you are planning to do, it can be easily done with the help of this machine.
Now, let’s talk about the USP of this machine which is its tendency to support composite, especially fiber material. The machine also supports Nylon material which makes it even bigger hit in the industry. This machine has really raised the bar of desktop 3d printers with its amazing feature line and great potential.