In today’s world, internet has proved to be the best medium to reach out to millions. This trend has been taken to the next level with the entry of social networking sites and portals like YouTube. If you have talent and you wish the world to know about it just upload a video on YouTube and bang you are famous! Celebrities like Justin Bieber and Akshat Singh, a contestant in the popular dance show Jhalak Dikhla Ja, are miracles of the internet revolution! So why not use this technology to promote another technology- 3D Printing.
In this article we will be talking about a YouTuber and his experiment to find out the materials strength of four different samples. Thomas Sanladerer is quite well known among YouTubers interested in 3DP technology. He usually puts up videos related to 3D printing and various other aspects that are related to 3D printing.
In a recent video, Sanladerer shows his experiment to check the strengths of four different 3D printing materials. For the test Sanladerer chose these materials:
- Formlabs SLA sample: Formlabs Form1+, Formlabs white resin, 100µm layers
- ABS: Mendel90 w/ E3Dv6, 250°C, 60mm/s, far-east black ABS, Slic3r and 200µm layers
- PLA: Printrbot Simple Metal w/ UBIS hotend, 208°C, 40mm/s, Printrbot purple sample PLA Cura and 200µm layers
- Taulman Bridge Nylon: Mendel90 w/ E3Dv6, 250°C, 50mm/s, Slic3r and 200µm layers
In the video he examines the four samples and tries to “torture” these parts in all possible ways so that the materials strength of the samples can be tested. He calls this experiment a semi- scientific experiment. To know more about the experiment and how it is conducted, continue reading..
Material Quality:
At first Sanladerer gives the viewers an over- view of how all the four samples look like. The drawbacks those were visible in each sample and the quality of the materials.
- First up was Formlabs. He says that the sample had great quality and the details on the sample were awesome. When taken in hand it felt very strong and the overhangs were very pretty. Overall it looked great!
- The next was the ABS sample and as per Sanladerer the material is cheap Chinese no name material. The fonts as well as the logo on the sample did not turn out well merely because the slicer was of inferior quality. Overall Sanladerer says that the quality is very bad and the overall output was disastrous.
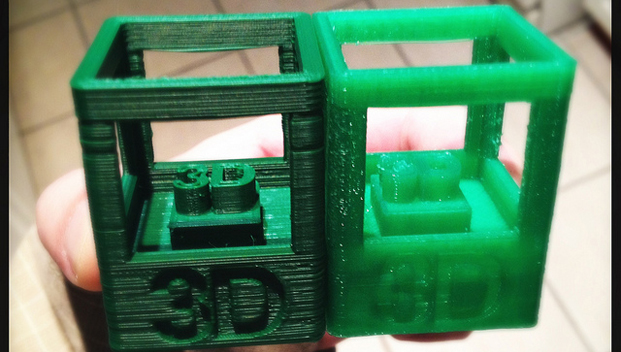
- The next part was a PLA Printrbot Simple Metal since the sample was sliced by curing instead of slicr, the font on the side was great but the logo on the top was not visible. Overall the print quality on this part was great.
- The nylon co- polymer printed Taulman Bridge sample turned out very well. It had a semi glossy surface finish but it had little strings hanging here and there unlike the previous printed samples. The reason behind this as stated by Sanladerer is that Nylon is a softer filament as compared to the other materials. There were absolutely no overhangs and the sample was close to perfection.
The Manual Breaking Test:
Now it’s time for some action. Sanladerer begins by trying to break each sample by hand which is not a great experience as after a few sample his fingers turn red and he also states that this test is a very subjective one but he tries to keep the test as close as possible. He says that all the samples were strong except for the ABS and the Taulman Bridge sample.
- The FormsLabs SLA sample which wouldn’t break and he couldn’t break anything off the sample.
- The next up was the PLA Printrbot sample; similar force was applied on the sample but nothing much could be done. Similar to the first sample it wouldn’t break.
- The ABS sample breaks off easily without the usage of any force. Sanladerer said that it was not shocking to him to see this part break like this because ABS is usually weaker in bonding areas.
- The last part was from Taulman Bridge and Sanladerer was very surprised to see that the overhangs tore off easily instead of breaking off from the structure.
Overall the winner of this test was FormsLabs SLA sample and the PLA Printrbot sample.
The Tension Test:
Tools needed:
- Clamps
- Vice
- Bucket full of water
- Spectraline string
In the level 2 of the materials testing experiment Sanladerer uses clamps placed on the base and at the tip of the sample and try and tear the parts apart from the center. With the help of Spectraline to form hooks around the samples so that the pressure was put in such a way that it was pulling the samples straight down, Sanladerer placed each sample on the vice and the tension is created from the weight of the bucket which is filled with water.
- The first sample from Formslabs was intact until the water in the bucket was filled till the brim and Sanladerer moving the bucket up and down. The weight of the bucket along with the water was close to forty pounds. The piece did not break easily.
- As in the first test, the performance of ABS was disastrous in this test too. Sanladerer went on to say that it was the only sample that had failed so miserably on this test.
- The reaction of the PLA Printrbot sample was similar to that of the Formslabs sample. It did break but after a long time.
- The Taulman Bridge sample as per Sanladerer was “amazingly strong” as compared to the rest of the materials. The material did not break but it tore like a piece of cloth because of the nylon properties.
So this round was won unanimously by the Taulman Bridge sample.
The Compression Test:
The next test was to crush the sample with the aforementioned vice- to leave no part standing.
- The performance of the Formslabs was the worst as it exploded in an instant and Sanladerer was actually very surprised.
- The ABS part gave in to the pressure gradually but it did not explode like the Formslabs sample.
- The third one up was the PLA Printrbot sample which did not give up easily and at the end additional force was applied to break it.
- The last one up was the Taulman Bridge sample; it was the most impressive of the lot. It was hard to destroy.
So in this test the Taulman Bridge sample was the undoubted winner.
Conclusion:
Sanladerer gave an overview for all the samples.
- Formslabs according to Sanladerer was pretty strong and the detailing on it is great. His suggestion was that if someone wants to use this material to make parts that need to bear load or tension then it would be better to use something else.
- The ABS sample did fail in the initial tests but he said that in order to make cheap and basic parts it’s better to use ABS than any other costly materials.
- The Printrbot PLA sample was relatively strong and the stiffest material in the lot. Sanladerer was surprised by its performance.
- The last sample was of the Taulman Bridge which according to Sanladerer was a “solid performer”. Unlike the other samples it was not stiff but had layer bonding strength because of which it did not break but tore off like a piece of cloth.
The final verdict of Sanladerer was that there was no clear winner in the tests but each material has its own strong as well as weak areas and it completely depended on the fact for which purpose the material is being used.