SketchUp which was formerly known as the Google SketchUp is probably the most inexpensive way to turning you from a thinker to a doer! It is a 3D modeling program which is helpful for anyone who wants to produce a 3D object. There are two versions of this software available in the market, the freeware version is popular on the web by the name of “SketchUp Make” and the paid version which had additional functions is called the “SketchUp Pro”. SketchUp was an independent organization till 2006 after which it was acquired by Google. Recently the company was purchased by Trimble Navigation.
The program is quite user friendly with an open source storage area which has many freebie model assemblies such as windows, doors, automobiles and even spaceships! There is also a 3D warehouse in which users can contribute by donating their designs so that others can use it. In brief the software allows drawing layout functionality allows surface rendering in various styles, supports third party “plug-in” programs. All these can be found on a site called the Extension Warehouse.
Now the main question is how to use this software. Here is a step by step guideline which would help and enable you to efficiently use the software and create something awesome!
Step 1: Get the Software
If you do not have the software then you can download a free copy of the software from the internet or use this link http://www.sketchup.com/download. There are a lot of features in the free version but if you want to have the paid version the prices are quite steep something like $500.
Step 2: Install
Depending on the OS of your system the installation steps might vary so read closely the instructions to install the software to your computer.
Step 3: Open the program
There would be a set of three axes which instantly will give you the feel of 3D. There is a tool option which comprises of Line Tool, Circle Tool and Polygon Tool. Each of these represents the basic structure of the object that you want to create.
Step 4: Try to know as few basics to navigate around the program
- The most important thing to know about SketchUp would be that it comprises of 10 simple tools. All these tools are important to make a 3D model.
- In order to get a view of the desired object from all the angles the first group of tools can be used. The first group of tools comprise of orbit, pan and zoom.
- If you wish to move the entire viewing screen push the centre mouse button and hold down the shift key on the keyboard.
- You can draw lines with the help of the line tool which opens up as a default function when you open the software. Try your hand at drawing lines but don’t forget that these lines are one dimensional.
- Beyond lines you can also try making two dimensional shapes with the help of tools for shapes. You can draw some rectangles, circles etc. All that is needed is to click on the necessary tool. Since the software is basically for 3D images the 2D images that you create will be shown as horizontal images.
- If the image is not perfect or you want to make something else you can click the arrow button on the toolbar. When the selection is made the object will turn blue then hit the delete button on the keyboard.
- If you want to save a project then click on the file option which can be easily located in the upper left corner. Once you click the file you can see the option of “save as”. Choose the location where you want to save the file and click ok. The file will be saved in the .SKP format.
Step 5: Create 3D images
After trying out all the above exercises you can now try your hand at making 3D images. In order to do that you can push or pull a 2D image into a 3D image. Use the push/pull toll to transform a 2D image to a 3D image. To do this there are a few steps that are to be followed.
- Select the push/pull tool
- Press the mouse button on the shape that you wish to turn into a 3D image.
- Then click push/pull the shape as per your requirement
- You can enlarge the object and also add in more structures
Step 6: Use panning and orbiting
Viewing of the object from different angles is an important part of 3D modeling and with SketchUp it’s quite an easy task. The pan tool allows you to move the drawing left, right, up and down. If you want you can do a combination of these actions.
The orbit tool allows you to get a bird’s eye view on the object. You can use the center scroll button on your mouse to orbit around the image.
Step 7: Move and rotate objects
This is a very useful application. This allows you to change the position of any object that you’ve created.
Step 8: Color or Paint the object
In order to use this application the shape must be complete so that color can be filled in them. When the shape of the object is perfect you can color the object as per your requirement. Using the paint tool, the objects can be painted in solid shades or in textures. With texture the experience is fun and also quite utile. To do this the following steps should be followed:
- To add color to an object click on the paint bucket
- Choose one from the category such as ground cover or Named colors.
- Select a color or texture then click the area of the shape on which you desire to place the color
- If there are nay unwanted edges you can do away with them with the help of the eraser
Step 9: Zooming
In order to see the details of the image that is created by you, you can use this option of zooming in and zooming out. If you have a mouse that has a mouse wheel you can see that rotating the mouse in one direction will zoom in and if rotated in the other direction it will roll out.
Step 10: Check the prebuilt models in SketchUp
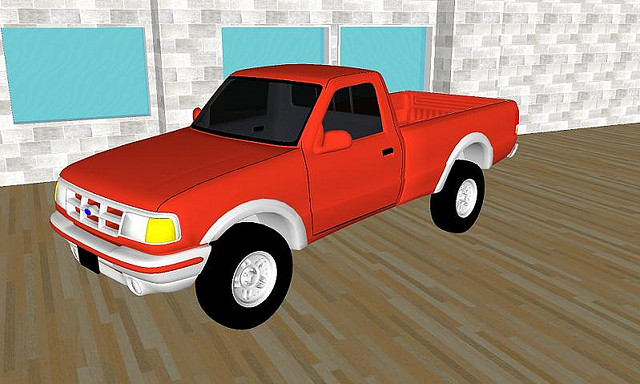
There are many models that are prebuilt in the software and if you wish to create something that is already there in the software then it will stop you from having to reinvent it. The warehouse has many objects that are helpful in the areas of architecture, landscape, construction, people and transportation.
Step 11: Try advanced tools
Once you are familiar with the standard tools described above you can try your hand at trying the advanced tools. Some of the advanced tools are the resizing tool, follow me tool, uniform tool, curve tool, text tool and the measuring tape tool. You can try your hand at using these tools as well.
Hopefully this exercise has acquainted you enough with the software and would help you in using the software with much ease. For more information, you can check this link.
Image Credit: Paul Heaston (flickrHandle: Paul_Heaston)