3D printing as a technology has been evolving almost everyday. Many enthusiasts, who are really passionate about 3D printing, have been trying to design or make things of their interest and while experimenting they are able to discover something new. 3D printing technology has basically become a global community where people with different talents are sharing their experiences and educating the rest of the community.
We all desire for perfection, and this desire for perfection has made 3D printing users to design technologies, like that of the CLIP (Continuous Liquid Interface Production) technology, that are able to give perfect 3D printing results., i.e., the output matches closely with the actual .STL model.
Jonathan Russell of Australia, who apart from being a huge fan of 3D printing, is also into graphic designing and web developing. Jonathan also feels passionate about technology and no wonder he has his own YouTube channel, TechWiz, where he shares tips and tricks on computer technology, unboxings, and reviews on various headphones.
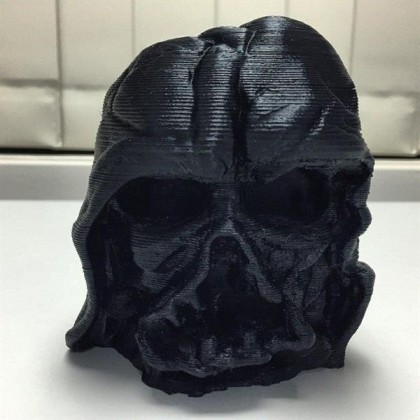
Recently his experience of 3D printing a Darth Vader, got video recorded and shared in his YouTube channel.
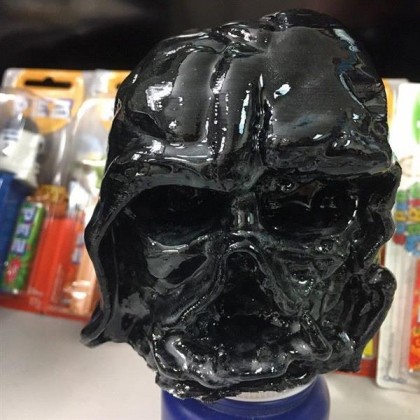
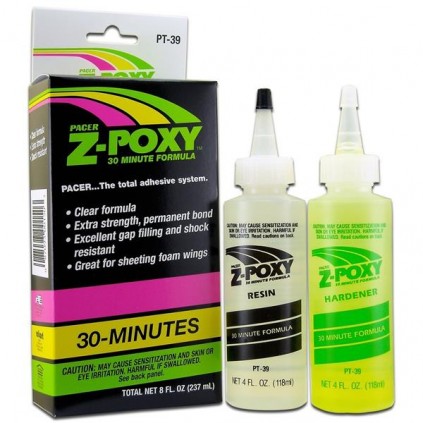
Russell wanted a smooth looking Darth mask. So he used Z-Poxy PT-39 30 Minute epoxy solution, which is manufactured by Pacer Technologies. “I wasn’t happy with cold vapour smoothing with acetone (or the dangerous hot method), so I tested out smoothing using epoxy instead,” said Russell.
“I was blown away by the latest Star Wars Episode 7 trailer and couldn’t believe it was not going to be out till December. Christmas 2015,” said Russell.
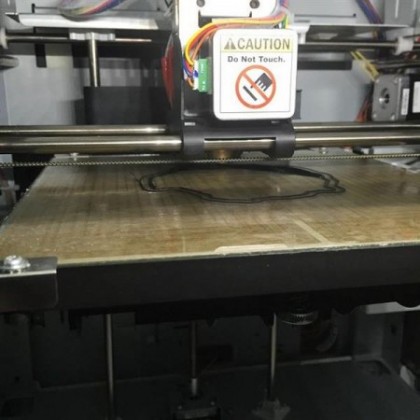
“So, packed with enough force to keep the Imperial March looping, the XYZ Davinci 1.0 3D Printer began its 16 hour journey into printing this Thingiverse 3D Model.”
The smoothing process seemed to be rather simple – he mixed the 40z bottle of Z-Poxy Resin with a 4oz bottle of Z-Poxy Hardener, and then brush the final Z-Poxy PT-39 30 Minute epoxy solution onto the model. After 30 minutes of waiting the final shiny Darth’s mask was ready.